31 March 2013

Pretty Gift Paper

I wonder who among you from Manila can relate to this post.

Over the past couple of years, I have found it difficult to find pretty store-bought gift paper. ( Of course, DIY wrapping paper tops my list!).  The ones I often come across have overwhelmingly loud prints in tacky fonts that shout “Especially for you” or “For your birthday!”  (Things that make you go “hmmm.”)

Gone are the black and white Tickles wrappers that I loved as a high-schooler in the 90’s.  

So when there are no other alternatives, I just opt to buy plain old cartolina or felt paper and spruce up the gift with a pretty ribbon and gift tag.

And when I stumble upon pretty gift paper, I get reeeeeeeally excited and grab some right away.

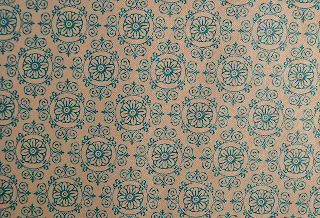
Here are some pretty gift wrappers I’ve scored over the years.  I indicated where I got them if you’re wondering where to find the perfect wrappers to prettify your gifts.

1.       Elephant-print gift wrapper.  I found this in a Greenbelt 3 shop in Makati.   (I cannot remember the name of the shop but it was on the ground floor near Firma). 


2.       Lili and Nana gift wrappers from Fully Booked in Rockwell Power Plant Mall, Makati.


3.       Wrap Shop gift wrap with pearly sheen from the Wrap Shop also in Rockwell Power Plant Mall.


4.       Printcafe wrappers from Printcafe in Festival Mall, Alabang.  They also have cute notebooks and stationery in these prints.  My co-teachers introduced me to this shop when they gave me these lovely papers for my birthday (they know what makes me happy!).


5.       Copper, brown and bronze paper from my fave local market district in Manila – Divisoria (not for the faint-hearted or squeamish!  Haha!).  Divisoria has these holes-in-the-wall that carry tons of gift paper.  They usually sell them for a minimum order of 25 sheets per print at a very low cost.  Most below Php10.00.


6.       Pinstriped gift wrappers also from Divisoria.  What I love about this wrapper is its versatility.  It alternates white and transparent strips so you can first wrap a box in any color of tissue or Japanese Paper, then wrap it again with this pinstriped wrapper and you get a gift in alternating stripes in white and the color of your choice.  


Other pretty gift wrapper sources that I rely on are Rinadesign shops by Rina Albert-Llamas (thank God she also designs wrapping paper)...

And some of the Fiesta Greetings gift wrappers (available at Office Warehouse and some Books for Less stores). 

What about you?  Where do you get pretty gift paper?  I'm really curious. =)

Thanks for dropping by!  Happy, happy Easter, everyone!

24 March 2013

Happy Play Dough Day


My daughter loooves play dough.  Months back, I was inspired to make homemade play dough from a youtube tutorial (sorry, can’t remember which one anymore) and although it ended up as a sort of gooey mess, she loved playing with it – kneading, rolling, folding, forming it.  She was at it for a long time, beating my DIY attention span.  When she was done playing with it, we kept it in an airtight plastic container and to my surprise, it kept for months.  She would take it out more often than I thought she would and use it as “food” for her homemade toy kitchen.

Fast forward to days ago...I was sorting out her Play-Doh toys and realized that the canisters were out of (duh...what else but) play dough!  They had dried up because they were not returned properly into the airtight containers or they had been shredded to bits in the process of making “ice cream.”  So we were back on YouTube.  I found this YouTube tutorial by candidmommy with the following ingredients:

3 cups of flour
1 tbsp of cream of tartar
½ cup of salt
2 cups of water
4 tbsp oil
Food coloring

Read on before copying this recipe...

My little assistants and I followed the recipe to bits, save for the cream of tartar which we did not have on hand.  I read somewhere that cream of tartar was meant to add “body” to the dough and as an alternative, you can use lemon juice.  Since we did not have lemons either, I improvised with two tablespoons of juice from our local lemon, calamansi.   

The procedure was to mix the first three ingredients in a bowl.  Boil two cups of water with the oil.  Pour the hot water and oil mixture into the dry ingredients in the bowl.  Mix together.  Sounded easy.  


We did just that but for some odd reason, ended up with an ooey gooey mess, worse than the one we made months ago.  (This is the reason why we do not have a photo of it.  My hands were covered in goo so I did not dare touch the camera).  Even if it was ooey and gooey, I was too excited to play with the dough myself and quite in denial, I distributed the slimy goo among the girls!  Our hands were all white and slimy and icky but hey, we were giggling and having fun!

The fun did not stop there.  We got a pack of flour and added a little of it here and there.  We must have ended up using half a pack more.  It worked! 

(Note to self: next time, slowly add in the water and oil mixture with the dry ingredients and while mixing, check for the best consistency.  Practice makes perfect.)

Afterwards, we added the food coloring.  I had the three primary colors on hand – yellow, red and blue – and with them, we made six colors of play dough: yellow, red (which came out more pink than red), blue, green, purple and orange.  We also set aside a ball of dough and left it white to use as vanilla ice cream!

I was so happy because we had so much play dough!  The empty Play-Doh canisters could not contain it all so we got an airtight plastic container to keep it all in.

Also, adding the flour and replacing the cream of tartar with the calamansi juice worked.  

It was a happy play dough day!  The girls played for about three hours with the homemade play dough and Play-Doh Cake and Ice Cream Confections Set.  

This was the true test of consistency.  Piping frosting onto the "ice cream" was easy enough for little hands! ; )


Another test of consistency - no leftover gunk on cupcake maker.  Fabulous!


They made this all by themselves!  Yummy-looking ice cream and sundae!
Some things we achieved through play: following step-by-step directions (*Cough*  Well, somehow...), improvising, taking turns, sharing, developing hand muscle control and mixing primary colors to make secondary colors.  Priceless.

I’m Baaaaaaack!


Finally, I’m baaaack after a two-year blogging hiatus!  So many things happened in the course of two years; little DIYs here and there but no time to blog.  Now that I am on bed rest (aka medical house arrest), I will use all this time to blog and share the little DIY projects and crafty stuff I’ve acquired or made...and create some more, and be my happy, productive, DIY self.

Happy to serve you.  Welcome to my life. :)