Showing posts with label Sewing. Show all posts

25 April 2013

How to Make Fabric Rosettes


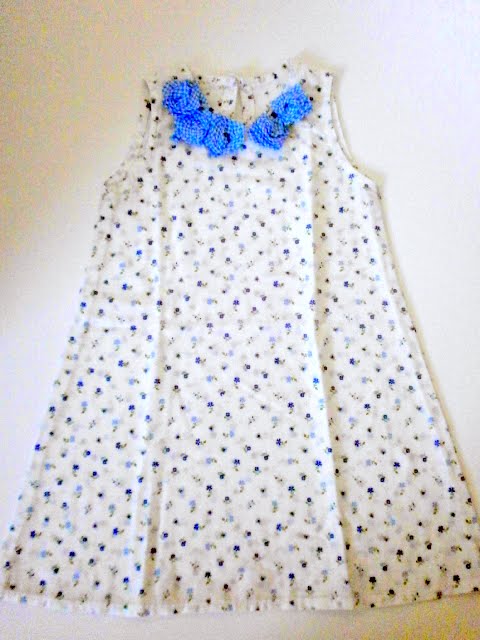
I made these fabric rosettes for my daughter's dresses about two years ago.   These dresses are too small for her now but are very dear to me.  A family friend of ours gave them to me out of the blue during a weekday mass.   She said she had bought them but found they would not fit any of her grandchildren so she thought of giving them away. Really, really sweet of her to have thought of me.  

I liked the dainty prints of the fabric and imagined that they would even look nicer with little fabric rosettes strewn near the neckline.

A friend of mine taught me this super easy way of making rosettes with fabric ribbon (a long, long time ago!) but for the rosettes on these dresses, I still scoured the web for other ways of making fabric flowers.  None of them made sense!  Hahaha!  Actually, they made sense, but they seemed complicated; none were as easy as how I know how to make them (whoever taught me how to make rosettes, thank you from the bottom of my heart!).

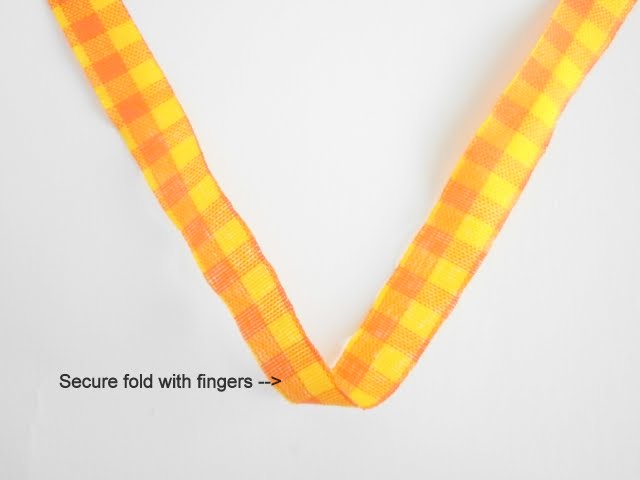
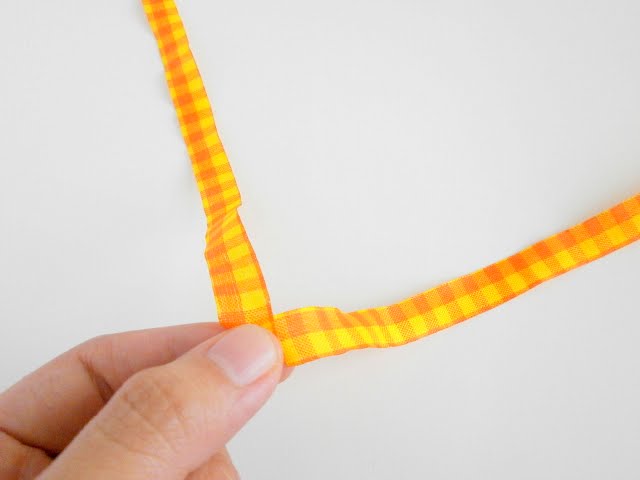
So this is how I make rosettes.  Quite shabby compared to the rosettes of OC tutorials I've seen online, but they turn out looking like rosettes so it's the way to go for me!  I'm hoping this tutorial saves you lots of time and that it's the easiest fabric rosette tutorial you find!  It's as easy as making crepe paper snakes ( we used to make these in school as easy classroom decor) and pulling one side of the ribbon so it gathers at the center.  Just look at the photo tutorial below and you'll understand what I mean.

For this tutorial, I used 24 inches of fabric ribbonNote that the size of your rosette will depend on the length and width of your ribbon so I encourage you to experiment with different ribbon lengths and widths to achieve the rosette size that you desire.

First, fold the 24-inch ribbon midway.


Really easy, isn't it?  

You can now sew it onto a plain white top to add some color to it.


Or make your own rosette clip.

My pretty niece modelling the rosette clip! = )

 
Here are some of my rosette projects.


Halloween 2011.  Angelina Ballerina homemade costume (more on homemade costumes in an upcoming post!).  Pink rosette on skirt.  I used a wide ribbon for this (maybe a 2" wide ribbon).

January 2012.  Wedding ring pillow with rosettes for my sis and bro-in-law's wedding.  I'm glad they entrusted such a task to me for their special day!  So relieved that they were satisfied with the result.  I used varied shades of silver and varied widths of ribbon for this project.  In photos are my handsome nephews! ; )

I hope this inspires you to make your own rosette projects.  It's as easy as pie!  =)

03 April 2013

Downsizing a Shirt


I’m not sure if “downsize” is the most appropriate term for this recent project.  But hey, humor me for now and let’s use “downsize” for this post, at least.  Haha!

This recent downsizing project was a result of reading about tons of DIY tutorials on T-shirt projects  from Pinterest ( I heart Pinterest!) and the need to re-size my daughter’s T-shirt  ASAP without cutting it to pieces and mangling it forever (as was advised by my dear hubby).

Not exactly my hubby’s words but the gist of what he said when I asked him if I can make the shirt smaller was – downsize but do not deform beyond recognition.   It was from grandpa so we want grandpa to recognize it when it’s worn!

The tag on the shirt says size 6-8 so this means it is meant for 6 to 8 year olds, right?  My daughter is probably two shirt-sizes smaller so that was my downsizing goal!

So again, with the sewing skillz I have to thank my Home Economics teachers for, I took to this sewing challenge.  Pros, I know this is quite amateur but it’s the best I can do with my bare hands and beginner skillz!

What I used:
Needle, thread, scissors (for cutting the thread), about 90 minutes.

First, I got one of my daughter’s shirts and put it against this yellow shirt to see how much smaller the shirt had to be.

After reversing the shirt, I laid it out flat on a surface and started sewing about half an inch from the sides using a backstitch.  I figured this would remove an inch from both sides right away (half inch from the front plus half inch from the back equals one inch less on each side).


I folded the sleeves inward by an inch and continued the side stitching.


I secured the opposite side of the folded sleeves with a knot and this is what it looked like.


To work on the shoulders, I tried to do my wabi-sabi way of ruching.  I folded the shoulder area about 2 cms apart and just knotted each fold, crossing my fingers that it would come out looking ruched when it’s turned inside-out. 


I don’t think it turned out bad at all and I was happy because at least I achieved decreasing the shoulder area by about an inch on both sides with wabi-sabi ruching!


After, I asked my daughter to try it on and hurray; she didn’t look swallowed by the shirt anymore! Here’s the finished product!


Hope this makes you brave enough to downsize shirts in the future!  I am sure you'll do a better job! ; )


02 April 2013

An Upcycled T-shirt


My daughter got a nice pair of floral jeans from grandma lately and I wanted her to wear them right away. 

But when I was trying to find a shirt that matched these cute floral pants, only an old fuchsia shirt with this tiny discoloration was the best choice...and the tiny discoloration, though tiny, was right smack in the middle of it. 


Tiny but annoying discoloration.

What to do?!  Upcycle!

I had some felt fabric on-hand so I decided to make a flower cut-out out of the felt to sew it on, right where the discoloration was.

First, I had my daughter put on the shirt, got my sewing chalk and marked the center of the shirt  (that's when I realized the discoloration was slightly off-center. It pays to check and re-check!).

Then I snipped a 2”x 2” square out of purple felt fabric.  From the square, I drew a flower with a pen and cut it up.  I drew a circle onto the fuchsia felt fabric and stuck it onto the center of the purple flower cut-out. 

With my beginner skillz, I stitched up the circumference of the fuchsia circle to sew the whole flower onto the shirt.  Then I secured the tips of each purple petal with a knot. 

Here's a close-up of the stitching and knot on each petal:
 And this is what it looks like on the underside:
A bit sloppy but I'm glad it can't be seen when she's wearing it.


So tada, old fuchsia shirt looks brand new again! 


What about you - what would you do to upcycle a shirt? = )